

How To Export Animation From Harmony To After Effects
Become started with animation in After Effects
Subsequently Effects CC might sound similar a complex program, but once you grasp some basic concepts, you'll be able to create a range of animation styles using Adobe's 3D, motion graphics and animation software.
- Get Adobe Creative Deject (opens in new tab)
In this article we'll run through some tiptop tips for animating illustrations in Afterward Effects, starting with the basics. And be sure to bank check out other peachy After Furnishings tutorials for beginners, intermediate and experts afterwards, for more practical tips and design inspiration.
01. Import files from Photoshop
After Furnishings allows you to incorporate Photoshop files into your composition (comp). When y'all import these files into a projection, the layers will retain their individual qualities – simply drag one onto the comp and it will appear on the blitheness timeline.
02. Use keyframes
![Use the position attribute to move the element during keyframes [click the top-right arrows icon to enlarge this screenshot]](https://cdn.mos.cms.futurecdn.net/3wjaKahZTnRas4DagYvBkh.jpg)
Clicking the triangle next to Transform will evidence Position, Scale, Rotation, and more. Each of these aspects is a keyframe – a location on the timeline that marks the beginning or end of a transition. To add a keyframe, select which characteristic y'all desire to change and click forward on the timeline.
The position, for instance, tin can change from one keyframe to some other by dragging it along the comp. When yous play the blitheness, it will travel forth the path you created.
03. Shine out transitions using easing
Easing can make transitions betwixt keyframes expect less choppy by organically speeding up or slowing down the animation. Find the Keyframe Banana carte under Blitheness to incorporate easing. Easy Ease does what the name suggests by easing the chemical element on both sides of the keyframe.
04. Suit anchor points
![Adjust the anchor points to ensure individual parts rotate in relation to one another [click the top-right arrows icon to enlarge this screenshot]](https://cdn.mos.cms.futurecdn.net/mgCUgHNVYb7KPryjbH4AZQ.jpg)
Parenting synchronises the changes of one layer with another layer'due south transformation. The wheel of a car, for instance, would be the child layer of a vehicle'southward body, which is the parent. In this instance, every time the automobile is moved, rotated or scaled, the wheel goes with information technology.
To assign the parent/child human relationship, beginning make sure that your anchor points are correctly aligned. Think nigh it similar the skeleton of a figure – what are the joints? When something rotates, where volition it rotate from? Drag the anchor betoken to change its position.
05. Connect elements
![Click on the child element (the spiral) and drag the icon to its parent [click the top-right arrows icon to enlarge this screenshot]](https://cdn.mos.cms.futurecdn.net/mojpwEVWxnctYWoBFFRtXP.jpg)
Once these points are determined, select the intended child element and click the spiral icon nether Parent. And so, drag it to the parent element and release – the two are now paired and any changes you make volition affect both parts of your new chemical element.
06. Add together movement
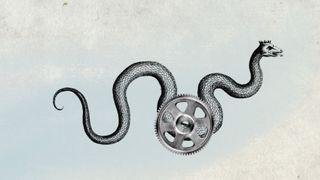
![Use the Puppet Pins to assign movement to different parts of the image [click the top-right arrows icon to enlarge this image]](https://cdn.mos.cms.futurecdn.net/kEfc8sCJ66nB4WbktuzRfN.jpg)
The Puppet tool adds natural motion to a rasterised image. A serpent can bob its head while its tail shakes, for example, all with the placement of a few pins.
Kickoff, click on the triangle next to furnishings and select puppet. Nether it, you'll meet Mesh 1. Click on the triangle next to it to bring up the Deform menu. You'll now be able to click on the areas where you'd like to to add Boob Pins – you tin experiment with this until you get the effect you lot are looking for.
Once you've finished placing your pins, click forward on the timeline and use the Transform belongings to stretch or distort each private pin. Your puppeted discipline volition be moving in no fourth dimension.
07. Consign your animation
![Export your animated illustration [click the top-right arrows icon to enlarge this screenshot]](https://cdn.mos.cms.futurecdn.net/PH2Nm62Akc8tvBknuaiZof.jpg)
Once you're happy with your animation, export it. To export an animation into a motion-picture show, get to File > Consign > Add together to render queue.
This commodity was originally published in Computer Arts magazine. Subscribe now. (opens in new tab)
Related articles:
- 40 amazing Afterwards Effects tutorials
- How to move over from Photoshop to After Effects
- The beginner's guide to Afterward Effects

Thank you for reading five articles this month* Bring together at present for unlimited access
Enjoy your beginning month for only £ane / $1 / €1
*Read v free articles per month without a subscription
Bring together now for unlimited admission
Try first month for but £i / $ane / €1
Related articles
Source: https://www.creativebloq.com/news/top-tips-for-creating-animations-in-after-effects
Posted by: hambybuir1998.blogspot.com
0 Response to "How To Export Animation From Harmony To After Effects"
Post a Comment